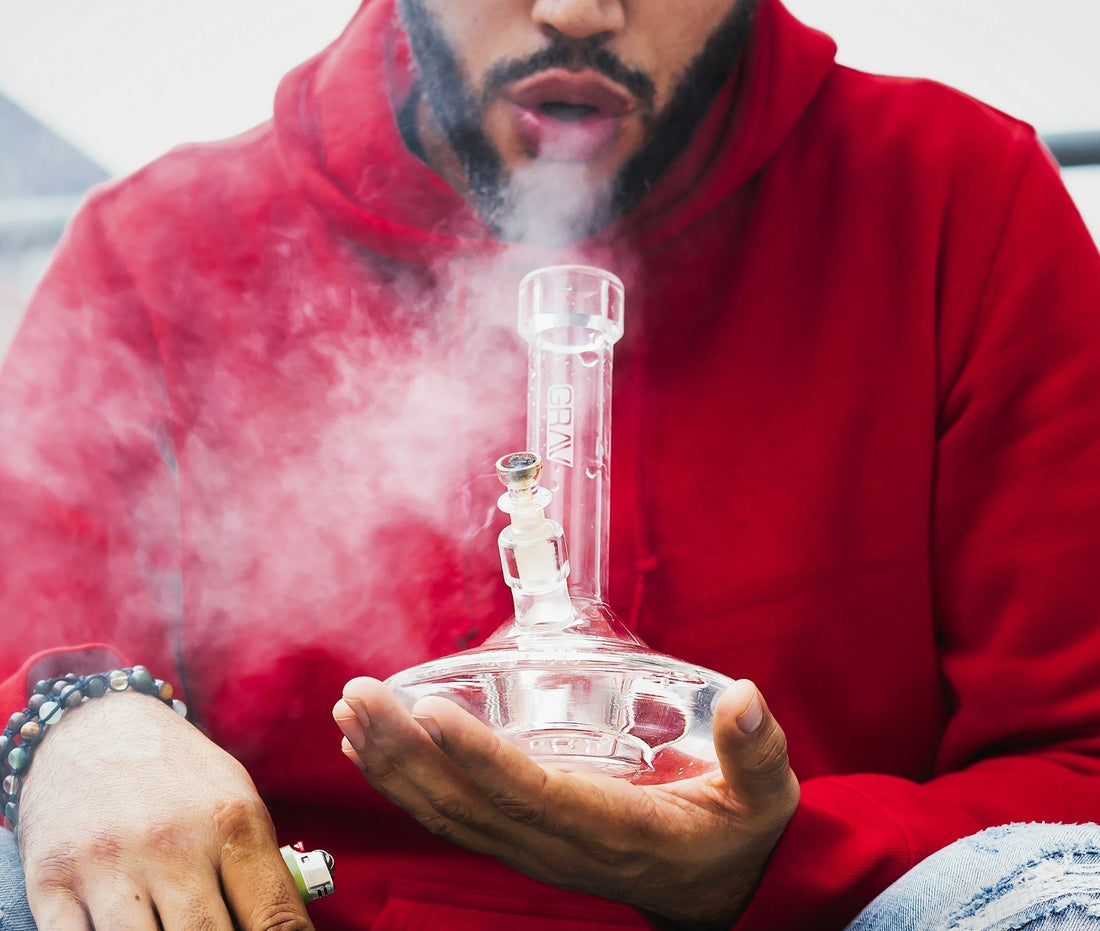
How to Dry a Bong After Cleaning: Effective Methods Explained
Share
After cleaning your bong, the next crucial step is drying it properly.
Ever wondered how long you need to wait before using your freshly cleaned bong?
Well, the good news is that once your bong is dry and free from any moisture, you can use it almost immediately. It’s important to ensure that there’s no water left inside the bong and that all the cleaning solution has been thoroughly rinsed off.
So, how do you make sure your bong is perfectly dry?
It’s actually easier than you think!
The simplest method is to let it air dry in a safe spot, ensuring it’s not disturbed. However, for those who want faster results, there are other methods to speed up the drying process.
Using a quality cleaner like ResinEater420 makes the drying process smoother, as it leaves no residue behind. This ensures your bong is spotless and ready for use.
By shaking off any excess water and allowing it to dry completely, you can ensure that your bong will be ready for its next use with no lingering effects from the cleaning process.
For even quicker drying, you can use a dry towel or a small fan to help circulate the air and speed things up. Your bong will be good to go in no time, leaving you with a clean, fresh experience each time you light it up.
In this blog, you’ll learn:
-
The importance of proper drying to prevent mold and maintain the quality of your bong.
-
Effective methods for drying your bong quickly and thoroughly.
-
Tips for ensuring your bong is completely dry and ready for the next session.
Let’s dive in!
Understanding the Drying Process
Proper drying is just as important as cleaning when it comes to maintaining the quality of your bong. After all, you don’t want any moisture lingering inside that could mess with your next smoking session.
So, why does drying matter so much?
Well, leftover moisture can cause a few unwanted problems, like mold, bacteria, and even unpleasant smells. These aren’t just nuisances; they can actually affect your health and the taste of your herb.
Have you ever noticed that after a cleaning session, a wet bong can leave behind a funky taste or cause the smoke to feel a bit off?
That’s the result of moisture being trapped inside. When you clean your bong, you’re not just removing resin and tar; you’re ensuring your next smoke is smooth and fresh.
Importance of Thorough Drying
Why rush drying your bong?
The more thoroughly you dry it, the better your next experience will be. Moisture left inside can cause:
-
Mold Growth: Even the smallest amount of water can foster bacteria or mold, which can be dangerous to inhale.
-
Unpleasant Odors: If your bong isn’t dry enough, it can lead to bad smells that ruin the purity of your smoke.
-
Water Dilution: Leftover moisture can mix with your smoke, diluting the taste and making your session less enjoyable.
Drying ensures that your bong is fully prepared, free of any unwanted dampness, and safe to use. Plus, it helps maintain the structure of your bong, so you’re not compromising the longevity of your glass.
Key Drying Tips
-
Towel Drying: After cleaning, use a soft, microfiber towel to dab away excess moisture. This helps prevent water spots and ensures quick drying without risking scratches.
-
Air Drying: Let your bong air dry by placing it upside down on a drying rack or soft surface. This allows gravity to help pull out any leftover water, leaving the bong clean and dry.
-
Avoid Direct Sunlight: While drying, it’s best to avoid direct sunlight, as prolonged exposure can damage the glass or cause fading over time.
By following these simple tips, you can ensure that your bong is dry, safe, and ready for your next session.
Risks of Improper Drying
Not drying your bong correctly can lead to several issues.
Moisture left inside can lead to problems like bacterial buildup. This can cause both clogs and unpleasant tastes during use. Additionally, it can increase wear on your piece, leading to cracks or damage over time.
Taking time to dry your bong well is a small step that has a big impact on your experience and the lifespan of your piece.
Preparation for Drying
Now that your bong is squeaky clean, it’s time to ensure it dries properly.
Drying your bong isn’t just about throwing it on a towel and walking away—it requires some attention to detail. So, what exactly does it take to properly prepare your bong for drying?
Start by thinking about all the parts of your bong: the bowl, downstem, percolators, and any other attachments. Any moisture left in these components can impact your next smoke. Trust me, you don’t want leftover water clinging to those hard-to-reach areas, especially when they’re places that could harbor bacteria or residue.
So, how do we tackle this?
It all comes down to preparation—gathering the right materials and giving each part the attention it deserves before it goes into the drying process.
Materials Needed
Before you start drying, let’s get all your supplies in place. You’ll need a few simple things to make the drying process smooth and effective:
-
Microfiber Towels: They absorb moisture better than regular towels and don’t leave lint behind.
-
Cotton Swabs or Pipe Cleaners: These are perfect for getting into the tight spaces that your towels just can’t reach.
-
Drying Rack: A clean, soft surface or drying rack will give your bong enough space to air dry without touching dirty surfaces.
-
Hairdryer (Optional): If you’re in a rush, a hairdryer in a cool setting can help speed up the process.
Having everything ready before you start ensures the drying goes smoothly and efficiently.
Disassembling the Bong
Here’s where a little bit of effort goes a long way: disassembling your bong.
While it might seem like a hassle, taking apart your bong and separating its pieces helps make the drying process more effective.
Think about it—how can you expect to dry a bong properly if it’s still in one piece, with all the nooks and crannies trapped with water? You want to get into those tight spots where moisture loves to hide. This is especially important for the downstem, bowl, and any percolators.
Start by removing the bowl and downstem.
Empty any water left in the base, then carefully lay out all the pieces on a soft towel or drying rack. It’s essential that you check each piece for lingering water droplets, especially around the joints and narrow areas where water can get trapped.
You can use your cotton swabs or pipe cleaners to gently remove moisture from these spots.
Disassembling your bong also helps you identify areas that you may have missed during the cleaning process. It’s a small but important step in making sure your bong is as dry as possible before putting it back together.
Drying Techniques
Once you have everything disassembled, it’s time to dry your bong. There are several methods, each with its benefits. Here’s how to tackle drying your bong like a pro:
Towel Drying
Towel drying is a hands-on approach. Use a microfiber towel for best results, as it absorbs moisture well without leaving lint. Start by shaking out as much water as possible.
Steps:
-
Use the towel to wipe the exterior and visible interior parts.
-
Roll the towel into a small tube and insert carefully for hard-to-reach areas.
-
Pay extra attention to crevices where moisture hides.
Be gentle to avoid damaging your glass. This method is quick, but make sure no water spots remain.
Air Drying
Air drying is simple and requires minimal effort. After shaking out excess water, find a spot where air circulates well. Place the bong upside down on a rack or a surface lined with a cloth. This allows gravity to pull out trapped moisture.
Tips:
-
Ensure airflow by using a fan to speed up the process.
-
Let it sit at least overnight to fully dry.
Be patient to ensure your bong is thoroughly dry before use. This natural method ensures that no unwanted lint or fibers are left inside.
Using Compressed Air
For a faster method, compressed air can be highly effective in reaching tight spaces inside your bong. Use a can of compressed air designed for electronics. Hold the bong at an angle to allow water to escape easily.
Instructions:
-
Gently spray air into every opening, focusing on the joint and percolators.
-
Move around the piece to cover all areas.
-
Repeat until no moisture remains.
This method is quick and efficient, perfect when you need a dry bong quickly. Remember to go slow and gentle to prevent damage.
Post-Drying Inspection
After you’ve taken the time to properly clean and dry your bong, the next step is inspection.
We know you’re excited to return to enjoying your favorite sessions but taking a few moments to check your bong thoroughly ensures you don’t miss anything important.
Think of this step as the final polish—the one that guarantees everything is in top shape. You wouldn’t skip checking your car before a long drive, would you? Similarly, inspecting your bong after drying is essential to ensure it’s truly ready for its next use.
So, how do you do it? It’s all about paying attention to the details.
Checking for Moisture Residue
Even though your bong has been drying, sometimes that stubborn drop of water doesn’t seem to want to leave.
You know the ones—those tiny droplets that cling to the hard-to-reach places like the neck or base of the bong. While they may seem insignificant, they can affect your smoking experience. Imagine lighting up only to realize there's a lingering, unpleasant water taste.
Yuck!
What should you do?
-
Inspect the entire bong carefully. Look at the interior and exterior, especially in the neck and around the joints.
-
Use light or a flashlight. Sometimes, it’s easier to spot any leftover moisture when the light reflects off the surface. This way, you won’t miss a single drop.
-
Check the percolators and bowl areas. These are places moisture loves to hide, and they’re crucial to your bong’s functionality.
Even a little bit of water left behind can interfere with airflow and, more importantly, the taste of your smoke. Make sure everything is as dry as possible before reassembling your bong.
Ensuring Complete Dryness
It’s tempting to rush ahead, but trust us, patience is key.
After checking for moisture, you want to confirm that your bong is fully dry before using it again. This prevents any lingering water from affecting your taste or the quality of your cannabis.
Here’s a quick tip:
-
Tilt your bong and drain any remaining water that might be hiding in corners or narrow spaces. Gravity works wonders here.
-
Leave your bong upright in a dry place to finish drying. If you're in a hurry, use a fan to help circulate air.
-
Check all components, making sure there’s no dampness left before putting everything back together.
Why does this matter?
The key reason is simple: moisture and mold. If moisture is left behind, you’re opening the door to mold growth and bacteria, which can build up and cause bad odors and even health risks. Proper drying ensures you don’t compromise the longevity of your bong or your health.
Reassembling After Drying
Now that your bong is clean and completely dry, it's time for the fun part: reassembly.
After all, a clean and dry bong means you're just a few steps away from enjoying a smooth hit.
-
Start by reattaching the downstem and bowl. Ensure they fit snugly, with no gaps.
-
Inspect all gaskets, seals, and joints to ensure they’re intact. A tight seal is essential to prevent air leaks during use.
-
Check any additional components like percolators or ash catchers. Make sure they’re properly aligned and reattached.
By now, your bong should feel like a brand-new piece, ready for action. The effort you’ve put into the cleaning and drying process will ensure a pristine smoking experience.
Maintenance Tips
To keep your bong in the best possible condition, don’t forget these essential maintenance tips:
Regular Cleaning and Drying
To maintain a clean bong, using the right cleaning product is essential.
ResinEater420 is an all-natural solution crafted to handle tough resin. Its eco-friendly formula means it's safe yet effective, ensuring your glass remains spotless without any residue.
Proper drying is just as important after cleaning. Gently pat your bong inside and out with a soft towel. Then, air dry in a well-ventilated spot to prevent moisture buildup, which can cause mold.
Your bong will remain clean and ready for use with the right care.
Use cotton swabs or pipe cleaners for spots that are hard to reach. This ensures all areas are clean and dry.
Proper Storage
Once your bong is clean and dry, store it correctly to keep it safe and functional.
Use a padded case or box to protect it from accidental drops or bumps. Ensure it's placed in a location where it won’t easily fall or be knocked over.
Keep your bong away from direct sunlight to prevent fading and heat damage. Store in a cool, dry place that maintains a steady temperature.
If you have spare parts, like bowls or downstems, store them together for easy access. This keeps everything you need in one place. Proper storage extends the life of your bong, keeping it in perfect condition for your next session.
Troubleshooting Common Issues
Now, let’s talk about some common issues that you might face while drying your bong along with some quick fixes!
-
Water Spots: If you find water spots after drying your bong, gently polish the glass using a microfiber cloth. This can also help prevent streaks.
-
Sticky Resin: Sometimes, resin bits might be left behind even after cleaning. Use ResinEater420 for effective removal. It breaks down stubborn tar, eliminating residue and protecting your glass.
-
Lingering Odor: If any odor lingers after cleaning, a vinegar rinse can help. Make sure to rinse thoroughly with warm water afterward to keep your bong fresh.
-
Difficult-to-Reach Areas: Q-tips or pipe cleaners can be useful for reaching tight spots. Cotton balls can be swirled around the surface for bottlenecks.
-
Damage Concerns: If you’re worried about breaking your bong while drying, lay it on a soft towel and let air circulate around it to prevent water from pooling inside.
-
Product Effectiveness: Choose ResinEater420 for the best cleaning experience. Its natural, alcohol-free formula makes maintenance smoother and ensures longer-lasting pieces. 97% of users have reported cleaner glass with less effort.
Keep your bong clean and always ready. Using the right tools and techniques makes all the difference in maintaining your favorite piece.
Frequently Asked Questions
After all that hard work cleaning and drying your bong, you probably have a few questions. Don’t worry—we’ve got you covered! Here are the most frequently asked questions about bong drying and maintenance.
What is the most effective method to dry the inside of a bong after cleaning it?
Use a small towel or cloth to dab the inside of the bong. Rotate and tilt it to help water flow out. A microfiber cloth is ideal because it absorbs water well without leaving fibers behind.
How long should you wait to use your bong after thoroughly cleaning it?
After using ResinEater420, wait until the bong is completely dry. This usually takes about an hour if left to air dry. The timing ensures the best smoking experience.
Can a fan be used to expedite the drying process of a bong, and if so, how?
Yes, a fan can help dry your bong quicker. Place your bong near the fan, allowing airflow to reach inside. This helps evaporate leftover moisture effectively.
What techniques can prevent residue from building up while drying a glass pipe?
After cleaning, use a lint-free cloth to wipe the pipe down. Proper drying with a clean towel helps to avoid residue buildup. You’ll notice the difference when using ResinEater420, which ensures minimal residue.
Is there a way to quickly dry a glass pipe after washing without causing damage?
A gentle shake to remove excess water helps. Then, use a hairdryer in a cool setting to dry it completely. Be cautious not to apply too much heat.
What precautions should be taken when drying a glass pipe to maintain its integrity?
Avoid using high heat or rough materials. Stick with cool air and soft clothes. ResinEater420 keeps your cleaning process safe and effective, preserving your pipe’s integrity.